Whether splitting paper Xs or settling a pin over the vitals of the buck of a lifetime (or both), the hunt for purpose-driven equipment truly designed to leverage odds of success can be a daunting undertaking. While serious archers certainly buy into get-what-you-pay-for bows and accessories, starting with the end in mind is a critical decision-making component. Known-distance archery competitors tend to stick with single-pin competition sights, while shooters engaging targets at varying distances, including bowhunters, tend toward multi-pins. That said, for many of us, a middle-ground single-pin sight with on-the-fly distance adjustability can be a perfect solution.
This indeed is where my perfect combination comes into play. My vision isn’t what it used to be. Between challenging eyesight and the propensity for variable-distance shooting on the hunt, a high tech system such as Spot Hogg Archery’s The Hogg Father sure seems like a perfect fit, but is it? Fortunately, as a writer I get to tinker with a lot of products, and this time around I had the opportunity to spend quality string-stretching time with the Hogg Father bowsight. In doing so, I learned a few things about Spot Hogg itself.
Spot Hogg: In Focus
A handful of release aid ideas, and a kitchen table turned workbench in 1987 strikes me as a pretty humble beginning, perhaps even more so than another one growing legs in a garage — although that’s a pretty humble beginning, too. Either way, some of the best products available in today’s burgeoning hunting and shooting industry started life in someone’s home.
And, while many have grown legs, walked out into the industrial world and found success, countless more never crossed the threshold — the disappointing dog-eat-dog reality makes Spot Hogg’s rise (and others like it) buzzworthy, especially since Spot Hogg’s decades-long commitment to enhancing the outdoor experiences of competitive archers and bowhunters is that much more of a testament to their relentless pursuit of purpose-driven, industry-leading performance. To such an end, Spot Hogg even describes its products as “The World’s Toughest.” Are they the toughest? I can’t say. There are still a mountain of archery products left to test, but of the Spot Hogg products I’ve worked with, all of them were certainly rock solid, including the Hogg Father bowsight. That said, let’s dig into it.
The Nuts and Bolts
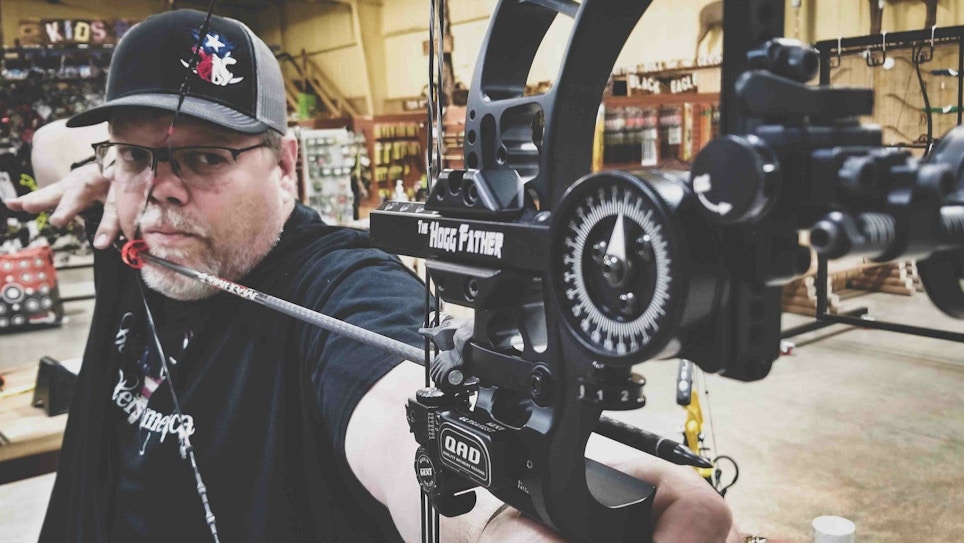
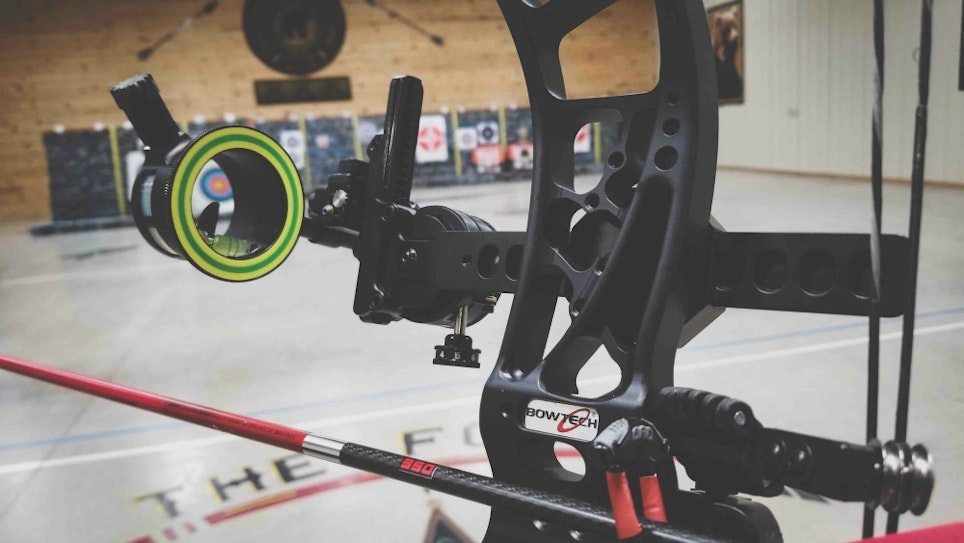
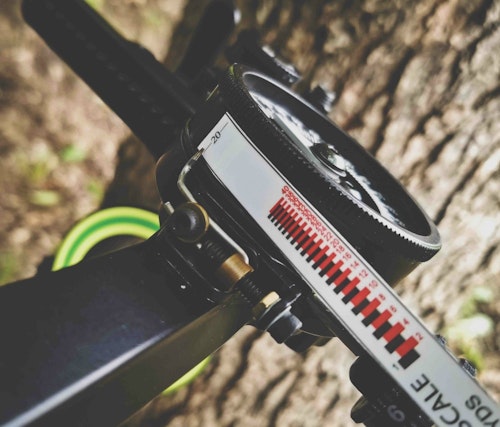
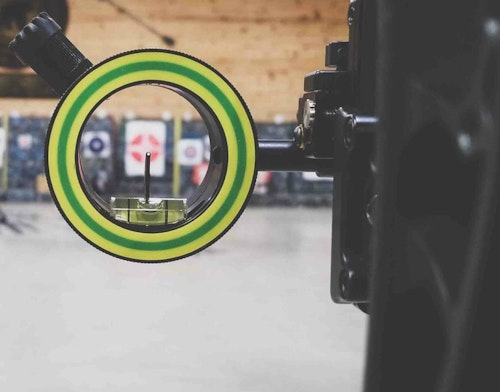
One look at the Spot Hogg and it’s obvious — there’s a lot going on! Although I chose to review a single-pin model, the Hogg Father comes packed in a handy hard case and is available in five pin options: single, double, 3-pin, 5-pin and 7-pin. The sight package also includes a calibration tape (above), yardage tapes, a single-ring pin guard and Spot Hogg’s popular multi-ring (MRT) pin guard for enhanced sight alignment with varying peep sizes and lighting conditions. The Hogg Father includes multiple micro-adjustable features, including second and third axes, tool-less windage and elevation and yardage pointer, as well as a quick-release knob, coarse vertical and horizontal adjustments and laser-engraved reference marks. Worth noting here for the double-pin option, Spot Hogg now includes its Double Pin yardage marker.
True to Spot Hogg’s promise to deliver “archery’s toughest products,” all three Hogg Father bowsight components — the bracket, sight arm and shooter ring assembly — are constructed heavy-duty, aircraft-grade 6061-T6 aluminum, while other elements are comprised of stainless-steel and other rock-solid materials. The quality and durability of the entire sight system is obvious without adding senseless weight to my bow — for a premium three-axis sight of Spot Hogg’s meaty caliber, the overall weight of the system was a welcomed surprise.
Perhaps the most noticeable aspect of the Hogg Father is the oversized yardage wheel referred to as the bull knob (below). Sure, it looks menacing but it’s not, and like everything else on the sight, serves an important purpose. The Spot Hogg also boasts a proprietary hardened rail design (HRD), specifically designed to eliminate “slop, buzz or the need to baby this sight.” Of course, the mounting bracket is just as solid. And, while there are plenty of moving parts in the forward assembly, given three axis adjustments, the shooter ring, pin guard and the pin assembly itself, once mounted the entire sight, from back to front is downright unshakable—even the sight’s adjustment levers and knobs aren’t letting go with one important, intentional exception.
Installation
For testing, I employed a Bowtech Realm SR6 bow, QAD UltraRest MXT arrow rest, SteadyForm tool and Carbon Express Maxima Red 350 arrows with 2-inch Blazer vanes. While the premium bow and accessories certainly enhance my shooter performance, adding the SteadyForm for testing also mitigated any potential for torquing and thus, any potential for unnecessary compensation. When it comes to archery sights, compensating is a major talking point worth highlighting.
While working as an archery technician years ago helped me understand the importance of a high-quality bowsight, especially on a properly set up bow, frank discussions with a few hardcore techs, at least one who has likely forgotten more than I’ve learned, enlightened me to the greater role sights actually play. Randy Grard, owner of Fort Grard Guns and Archery in Weatherford, Texas, and perhaps the most experienced and knowledgeable technician I’ve had the pleasure of engaging, summed up the paramount importance (and dangers) of bowsights in a single gut-check statement, “The sight system becomes a slave to your bow’s setup.”
Understanding how easy it is to use a sight to incorrectly compensate for problems elsewhere in the bow setup, including center-shot, incorrect rest installation, poor timing, nocking point height, overall leveling and even arrow selection is a great foundation for sight installation and testing. Even before installing the Hogg Father, I took the bow setup to Randy. His shop is exceedingly well equipped to ensure the bow, short of the sight, was perfectly tuned before installing the sight.
Once the sight was installed, Grard double-checked center-shot in relation to the pin position. We then adjusted the bull knob to 76, removed the shooter-ring assembly and reinstalled it flush with the bottom of the vertical bracket per Spot Hogg’s instructions. Even bowsight installation or weak shooting fundamentals are commonly compensated for in sight adjustments. As a final installation check, I nocked an arrow, came to full draw and assessed my sight alignment and sight picture — the exercise resulted in extending the rail further out until the MRT pin guard (shooter-ring) was appropriate to the field of view through my peep sight.
Sighting-In
After adjusting the rail, I grabbed my arrows and moved to the 20-yard shooting line. As a guy with a disease in both eyes (Keratoconus-effectively astigmatisms on steroids) I struggle with pins star-bursting and ghosting to the extent that by the time I moved away from multi-pin sights, the pins melded together to form a vertical line of blurred hell. At one time, I began to believe my bowhunting days were over. A combination of a single-pin sight, complete with a sight light and 2X magnified lens helped tremendously. The addition of a hooded Specialty Archery Peep Sight with no. 6 verifier lens made my field of view downright crisp.
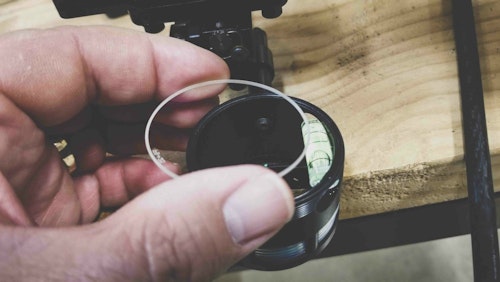
I followed suit with the Hogg Father by adding a 2X magnifying lens (below), rheostat sight light, a Specialty Archery Peep Sight, again with the verifier lens and switched to Spot Hogg’s MRT pin guard. My field of view was razor sharp, and with the sight light lightly illuminating the pin, target acquisition was quick and effortless. It was time to finally dial in the Hogg Father.
To sight-in, I focus shots on one axis at a time; for me, the vertical line first and then horizontal (windage and then elevation). Initial shots were 1.5 to 2 inches to the right of the vertical line. I followed my point of impact with a course adjustment. The next string of shots impacted a half-inch off of center. For final tweaking, I loosened the lock-down lever and turned the windage micro-knob. One last string of shots left arrows spaced fairly evenly down the vertical line.
I moved onto elevation by shooting six arrows from left to right at the horizontal line. All six arrows impacted 3 inches high. I disengaged the bull knob by pushing it toward the shooter ring and raised the pin what I determined to be 3 inches. Another string revealed shots still a half-inch high. With the bull knob disengaged, I turned it to make fine adjustments and then locked it again by pushing it back toward the riser. I shot another string to verify, this time at intersection of the two axes.
Satisfied with my 20-yard results, I pulled a calibration tape and installed it on the spine of the bull knob with the 20-yard indicator perfectly aligned with the yardage marker. If the 20-yard line isn’t perfectly aligned with the yardage marker, the marker is micro-adjustable. With 20 yards sighted in and the calibration tape perfectly applied, it was time to move outside for longer shots.
Spot Hogg recommends 60 yards, so I followed instructions. I increased yardage incrementally through 30, 40 and 50 yards until I began grouping consistently at 60 yards. Once I was happy with my 60-yard grouping, I looked at the corresponding number on the calibration tape directly under yardage marker and pulled that tape number from the multitude of other tapes included in the Hogg Father kit. I turned the bull knob again until 20 was directly under the marker again, then replaced the calibration tape with the correct yardage tape, again with 20 directly under the marker. Once sight-in was complete and the correct tape installed on the bull knob, I spent more time shooting at a few different distances. As expected, calibration was spot-on and shot placement was precise.
Final Shots
With most of my bowhunting activity occurring at night for hogs, I ventured out into the darkness to test low-light, no-light performance. For nighttime bowhunting, not only do I depend on a robust field of view through the peep sight, but I also depend heavily on a rheostat sight light and 2X lens — all of which are part of the Hogg Father and Specialty Archery Peep combination I used. The sight combination, along with a Firefield Hog Laser designator (a laser illuminator with adjustable throw from spot to flood) mounted to the Bowtech Realm SR6’s riser, produced effortless target acquisition and precise shot placement. As I had hoped, Spot Hogg’s Hogg Father bowsight is perfect for nighttime bowhunting.
Considering cons, there are two areas where obvious improvements can be made. First, when the vertical micro-knob is disengaged the bull knob can be rotated quite easily — this adjusts your elevation. The knob can easily disengage by bumping it, potentially compromising your elevation. Second, an additional rheostat sight light illuminating the yardage tape would be nice for on-the-fly distance changes in the dark. While this improvement may not be readily obvious for most bowhunters, it would be quite a welcomed feature for guys like me who most often bowhunt at night.
Finally, circling back to value in our get-what-you-pay-for world, the robust multipurpose, micro-adjustable design of the Hogg Father should appeal to virtually any archer or bowhunter. With single- and multi-pin options, single- and multi-ring pin guards, accessories like Spot Hogg’s sight light and magnifier lens and arrow-drop-specific calibration, what need doesn’t the Hogg Father sight fill? Honestly, the Hogg Father fulfills archer needs so completely, from target shooting to hunting, even in the dark, it’s well worth the space on retailer shelves and demanding archers’ bows.
