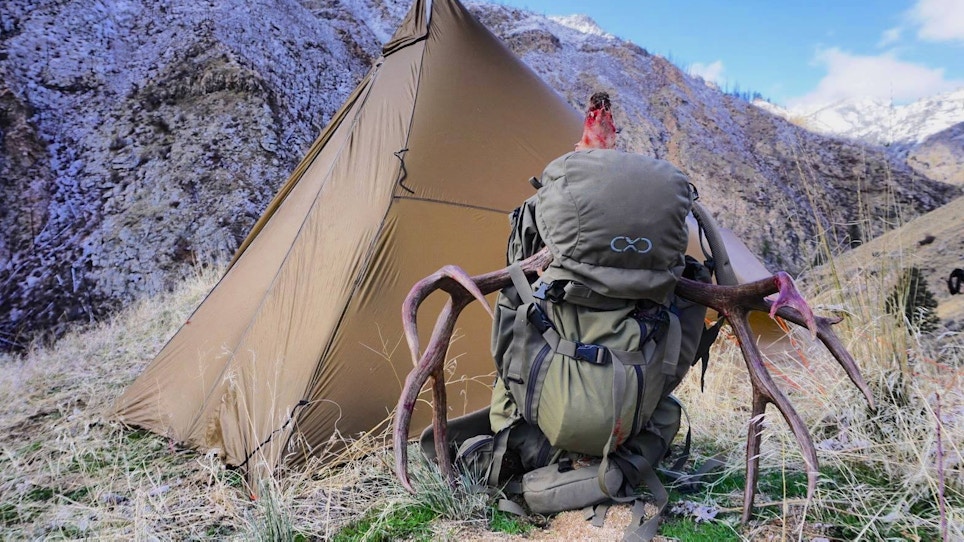
Photo: Ryan Lampers, Exo Mountain Gear (Facebook)
Sending a customer out of your store with a poorly fitted pack is a risky endeavor. To ensure your customers leave as, and remain “Happy Campers” (pun intended), follow these guidelines to increase customer satisfaction and appreciation.
Today’s packs are much more comfortable and adjustable than those of yesterday. Finding the “perfect” pack that “fits” is attainable, if customers avoid simply buying the first pack that catches their eye. There are packs for everyone, regardless of size and shape. With the correct measurements and a little time spent, everyone can be in a pack that fits them, comfortably even with heavy loads. The following is a primer to proper pack fitting and happier customers.
Torso Length
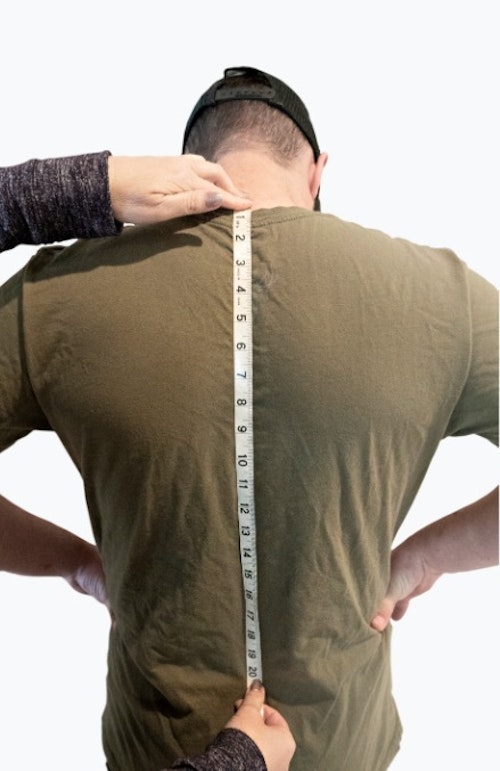
To begin, find the correct torso length. To measure, use a soft tape. First, have the customer slide their hands down their sides — with bended elbow, palms down — until they hit the top of their hipbones, the iliac crest. Imagine a line across the back connecting the two points. This line becomes the lower measurement point for the torso. Next, have them bend their neck forward, touching their chin on their chest. Then find the C7 vertebra, which in layman’s terms, is the bony bump on the back of the neck. Following the spine, measure the distance between the C7 vertebra and the imaginary lower line. This distance provides the torso length. Today’s top-quality backpacks are designed for a specific torso length or are adjustable, fitting a range of torso lengths.
Waist Belt
Generally, when the torso length fits someone, the waist belt for that pack will fit as well. However, most companies also offer different waist belt sizes as an option. So, it’s always a good idea to measure to make sure. To do this, measure with a soft tape along the iliac crest around the body. Since this line is higher than the belt line, you cannot simply go off someone’s pant size. The hip belt needs to able to adjust both longer and shorter. The reason, to have the flexibility to adjust to varying clothing layers during use.
Minor Adjustments
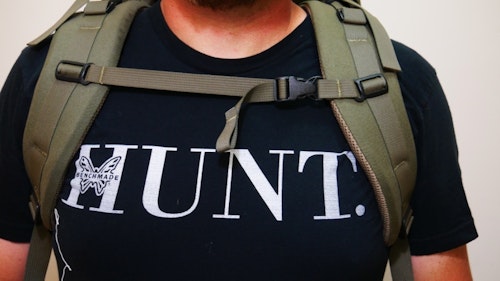
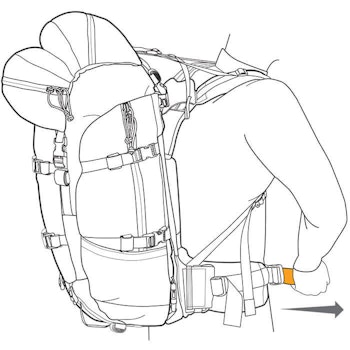
Once you have appropriately identified the torso length and hip belt size, the next step is to adjust the pack. It’s best to do so with added weight in the pack. Before you begin, loosen all of the straps and put in a moderate amount of weight. From there, follow these steps. First, tighten the hip belt so that it’s sitting on top of the hips, snuggly. Second, tighten the shoulder straps until they wrap over the shoulder without a big gap along the back. If there is a gap, tweak the torso length to remove it. Third, adjust the load lifters — straps from the top of the pack, above the shoulder straps. Properly fitted, these straps should be at about a 45-degree angle. To fit, either tighten or loosen. Lastly, adjust the sternum strap. This strap should be about an inch below your collarbones. If you cannot adjust the sternum strap, vertically to ride here, you need to find a different pack.
You especially do NOT want the sternum strap riding too high. This strap is meant to keep the shoulder straps in place, relieving some stress from the shoulders. Furthermore, if it’s not situated correctly, it will be more uncomfortable when fully packed for use.
Once you have all of these adjustments made, the bulk of the weight should be felt on the hips, not on the shoulders. When properly fitted, even a heavy pack will feel comfortable and much lighter than it actually is. Conversely, a poorly fitted pack will make its weight feel much more substantial than it is.
Pack Size
In todays market there are packs for everyone out there. Whether someone is planning a day hunt or a two-week backpacking sheep hunt, there is likely a pack out there to fit. Ultimately, a lot depends on personal preference, as well as individual needs to be “comfortable.” It also depends heavily on each person’s gear — weight and bulk. However, below is a guideline to start from when it comes to picking a pack size.
Day Hunts
If all that is on the docket is a day hunt, a person will not need a huge pack. A pack in the 1800-2200 cubic inch range should be plenty to carry all of the gear needed for a day’s hunt. Gear may include, but not be limited to extra clothing, food, water, camera, ammo and field-dressing tools. However, it may have to be large enough to pack a quartered animal as well.
Overnighter
If someone is planning an overnight trip, a pack in the 2800-3200 cubic inch range should suffice. These days backpacking gear is lighter and more importantly, less bulky. With modern gear, a hunter should be able to go overnight with a tent, sleeping bag, sleeping pad, water filter, small stove and all of your other hunting gear in a pack this size.
Multi-day
The gear needed for a multi day trip is not that different from that for an overnighter other than more food and water, and possibly extra clothing. Still, a bigger pack is often a better option for an extended stay on the mountain. For these types of trips, a pack in the 4000-5500 cubic inch range are suggested. Packs this size allow for plenty of room for hunting gear, camping gear, extra clothing, as well as plenty of room for the food required to stay multiple days.
Week Long+
Most hunters don’t spend more than a week on a hunt without making it back to the truck to re-stock. But there are a dedicated few, who do it on a regular basis. For trips this extensive, there are many great packs out there in the 6000-7200 cubic inch range. These packs provide all the room needed for all the gear of shorter hunts, as well as extra space for more food, extra clothing and other necessities a person may need to survive these long trips in relative comfort.
Loading the Pack
When hitting the trail, knowing how to pack gear in a pack is vital. On a longer hunt, a pack needs to be packed so that the pack “rides” best, but also, so gear items are easily accessible. It’s a good idea to separate gear into daily-use, camp-only and one-time use, like a kill kit for when an animal is harvested. Stress the following guidelines to your customers.
The bottom of the pack can be packed with items like that kill kit, rain gear (if rain is unlikely at the onset), extra clothing and the like. On top of that is a good place for sleeping bags and sleeping pads.
The middle of the pack is the best place to put heavier items. Examples are a cook kit, food, water, tent and spotting scopes. Having the heavier items in the middle of the pack is the best, most stable location to ensure that the pack rides well on the back.
The top of the pack provides storage for items needed on a regular basis such as a jacket, food, water filter and a camera. For packs with a lid and/or outer pockets, frequently used gear should reside there. Such items may include headlamp, flashlight, gloves and a beanie. Many packs have places on the outside as well where a tripod and spotting scope can be stowed easily without tearing everything out of the pack to glass quickly.
Final Thoughts
There has never been a better time to be a hunter as far as gear goes. Many companies are going to great lengths to provide the best gear possible for people, regardless of their hunting goals. Knowing how to provide your customers with the right gear to match their specific application(s), is the key to keeping happy, satisfied customers. The next time a customer walks out of your shop with a backpack, follow the guidelines above to ensure they walk back in to purchase their next gear item.
Product Spotlight: Exo Mountain Gear K² 3500 Pack
The K² 3500 is designed as a do-it-all pack. It’s perfect for day hunting or multi-day trips into the backcountry in search of big game. The pack is solidly constructed from a combination of 500d Cordura and 420d Diamond Ripstop. The K² Titanium frame is 25-inches tall, and is designed to be rigid, but to move laterally with the body. It’s been load-tested, capable of carrying well over 250 pounds, more than any hunter will ever need.
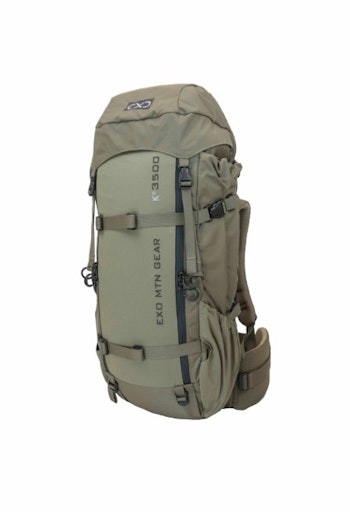
Key Pack Features
- 3500 – 7000 ci
- 14 Compression Straps
- Roll-top Enclosure
- FTE Dry Bag accessory
- Floating, Removable Lid
- Integrated Water Bladder Sleeve
- Stretch External Pockets
- Full Length Side Pockets
Key Frame Features
- K² Titanium Frame
- Modular and Interchangeable
- Non-slip Lumbar Pad
- Micro Torso Adjustable (16″-21″)
- Angled compression straps for better load hauling
- Meat Hauling Load Shelf
- Accessory Attachment
Specs
- Weight: 5.1lbs
- Dimensions, Compressed: 3" x 11.5" x 26"
- Dimensions, Expanded: 8" x 11.5" x 36"
- Total Volume (cubic inches): 4200
- Frame: K² Titanium
- Dry Bag Compatible: Yes
- Belt Sizes: Small, 29-33"/Medium, 34-36"/Large, 37"+
